We're independent: products are chosen on merit and prices come from the retailers' own sites. We may earn a commission if you buy through our links. Learn more.
Key takeaways
- A 1 kg batch of flour with a 10 g sachet of instant yeast fills a flat-bottomed pot of about 5 litres (a No. 12). Halve it for a No. 10 of about 3 litres.
- Let the dough rise once in a bowl, then a second time in the greased pot until it has nearly doubled, before any coals go near it.
- Use fewer coals underneath than on the lid. Cast iron holds heat for a long time, and the bottom burns long before the top does.
- Expect about an hour for a full loaf. Don't lift the lid for the first 30–40 minutes.
- It's done when the crust is golden, the loaf sounds hollow when tapped and a skewer comes out clean.
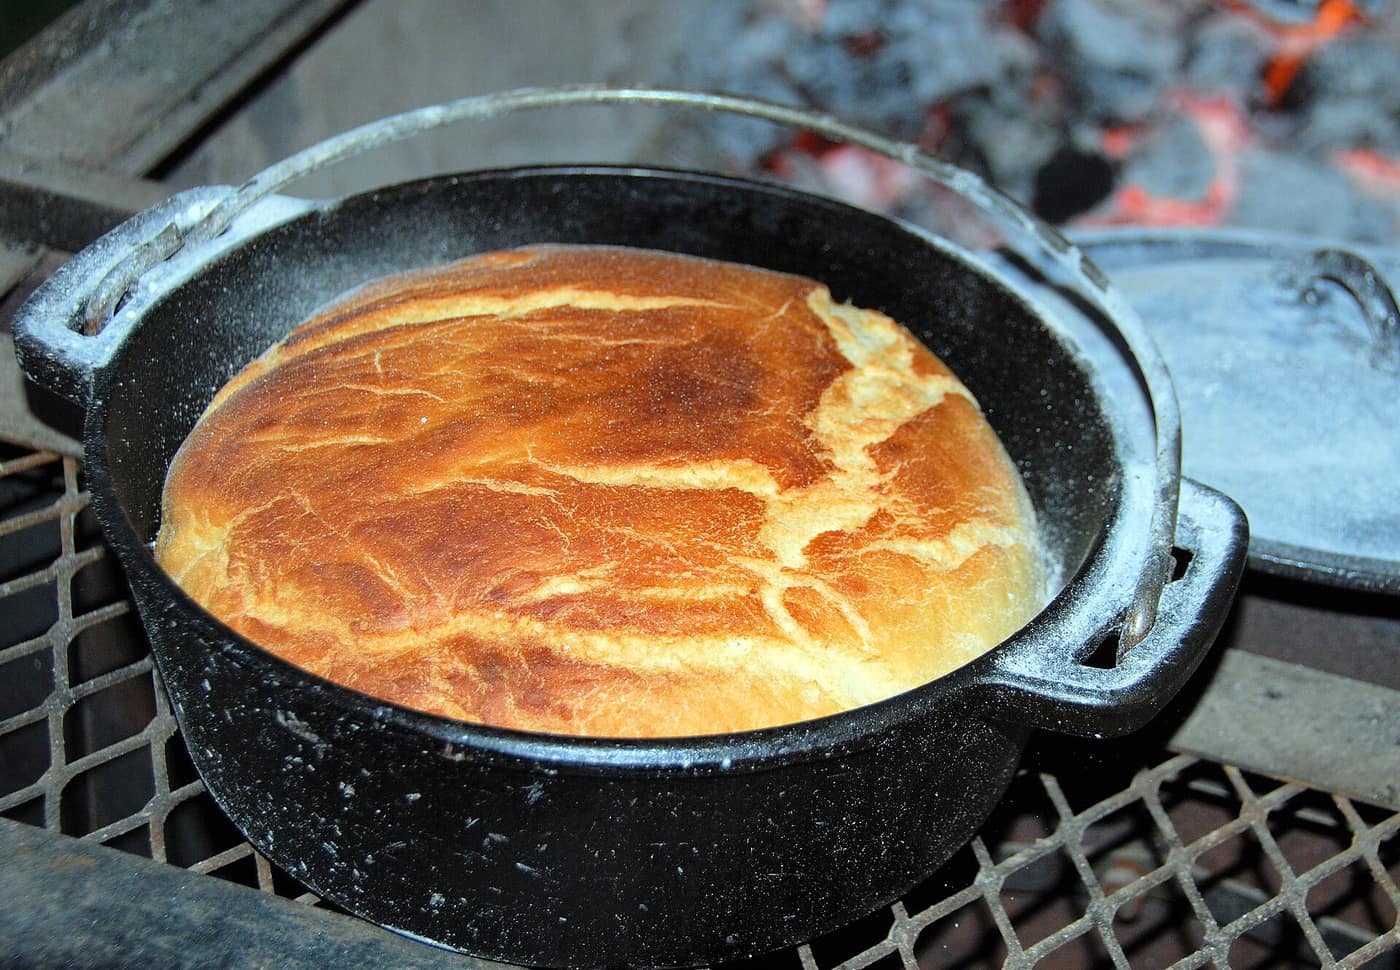
Potbrood is the bread that comes out of the pot at a braai and makes everyone stop talking for a minute. A whole round loaf, crusty on top, soft inside, baked over the same coals as the meat. Tear it open, add butter and apricot jam, and it rarely survives to the end of the evening.
It looks harder than it is. The dough is a plain yeast dough, and the pot does most of the work. The skill is in the coals: how many go underneath, how many go on the lid, and when to leave it alone. This guide gives you a recipe that works, then covers proving, heat, timing and how to tell when the loaf is done.
Potbrood at a glance
| Makes | 1 loaf (8–10 people as a side) |
| Pot | Flat-bottomed cast-iron pot, about 5 litres (No. 12) |
| Hands-on time | About 20 minutes |
| Rising time | About 1 hour in the bowl, 30–45 minutes in the pot |
| Baking time | About 1 hour |
| Heat | A few coals underneath, more on the lid |
| Done when | Golden crust, hollow sound when tapped, skewer comes out clean |
The pot
Potbrood is traditionally baked in a flat-bottomed cast-iron pot, sometimes sold as a bread pot or bake pot. Its lid has a raised rim that holds coals, so the bread bakes from above as well as below.
Flat pots are numbered, but the numbers don’t match the three-legged potjie sizes. A No. 10 flat pot holds about 3 litres and a No. 12 about 5 litres, according to the listings from Megamaster, LK’s and Cadac. Sizes still vary from brand to brand, so check the litre capacity on the pot itself.
A round three-legged potjie works too. The loaf comes out rounder underneath, and the curved bottom sits closer to the coals, so it needs even fewer coals below. Our potjiekos guide explains the pot types, and the potjie size calculator helps if you are still deciding which one to buy.
The potbrood recipe
Ingredients (one loaf for a No. 12 flat pot, about 5 litres)
- 1 kg white bread flour or cake flour
- 1 sachet (10 g) instant dry yeast
- 15 ml (1 tbsp) salt
- 30 ml (2 tbsp) sugar
- 30 ml (2 tbsp) sunflower oil or melted butter
- About 600 ml lukewarm water, plus a little extra if needed
- Butter or oil and a little flour for the pot
For a No. 10 flat pot (about 3 litres), halve everything.
Method
- Mix the flour, yeast, salt and sugar in a big bowl. Instant yeast goes straight in with the dry ingredients.
- Add the oil and most of the water. Mix until it comes together, then add the rest of the water slowly until you have a soft dough that isn’t sticky.
- Knead on a lightly floured surface for about 10 minutes, until it’s smooth and springs back when you poke it.
- Put it in a lightly oiled bowl, cover with a damp tea towel or cling wrap and leave it somewhere warm for about an hour, until doubled.
- Grease the inside of the pot and the lid well, then dust with flour.
- Knock the dough back, shape it into a smooth round and put it in the pot. Put the lid on.
- Let it rise again in the pot for 30–45 minutes, until it has nearly doubled and almost fills the bottom half of the pot.
- Bake over a few gentle coals with more coals on the lid for about an hour (see below).
Bread flour or cake flour?
Both work. Bread flour has more protein, so it gives a chewier loaf that holds its shape better. Cake flour makes a softer loaf. For a nuttier loaf, swap a quarter of the white flour for brown bread flour; much more than that and the loaf gets heavy.
Proving: let the pot do the waiting
The second rise, in the pot, is the step people rush. Dough that goes onto the fire before it has risen properly bakes into a tight, heavy loaf that cracks open on top.
- Where: somewhere warm and out of the wind, near the fire but not right next to the flames, which start cooking one side of the dough.
- How long: about 30–45 minutes on a warm day, longer in winter. Go by the dough, not the clock.
- The poke test: press a floured finger gently into the dough. If the dent fills back slowly, it’s ready. If it springs back straight away, give it more time. If it doesn’t fill back at all, it’s over-proved, so bake it now.
Coals under the pot and on the lid
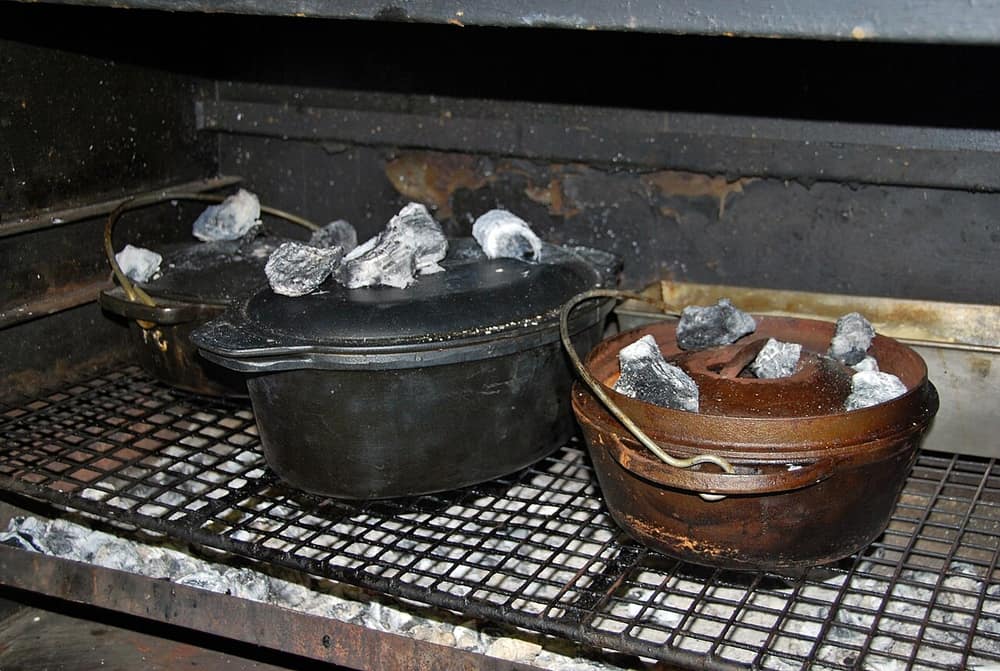
This is the part that decides whether you get a golden loaf or a black-bottomed one. Cast iron soaks up heat and holds it, so the base of the pot keeps baking long after you’ve moved coals away. The usual mistake is too much heat underneath.
A rule of thumb
- Underneath: a thin, sparse layer of coals that have burnt down and have a grey skin. Think a few coals spread under the pot, not a full bed. If your braai lets you, set the pot on a grid a little above them.
- On the lid: more coals than underneath, spread evenly across the lid. Many cooks aim for roughly twice as many on top as below. It’s a starting point, not a law.
- Topping up: check every 15–20 minutes and add a few fresh coals on the lid as the old ones fade. Top up underneath only if those coals have almost died.
Have a second small fire going to one side so you always have fresh coals to hand. Our guide to making a braai fire covers building and managing coals, and charcoal and briquettes are worth considering here, because briquettes burn at a steadier heat for longer than wood coals.
Turning the pot
Most fires have a hot side. Give the pot a quarter turn every 15 minutes or so, and turn the lid the opposite way. It evens out hot spots without lifting anything.
How long to bake potbrood
A full 1 kg loaf in a No. 12 flat pot takes about an hour. Some recipes allow up to 1 hour 15 minutes; a half batch in a smaller pot can be ready in 40–50 minutes. The heat of your coals matters more than the clock, so treat these as guides.
Don’t lift the lid for the first 30–40 minutes. Every time you open it, the heat and steam escape and coals and ash can fall onto the bread. When you do check, lift it straight up with gloves or a lid lifter and set it down on something heatproof, coals and all. Our braai timer can remind you when to turn the pot and add coals.
How to tell potbrood is done
Check a few signs together, rather than relying on one:
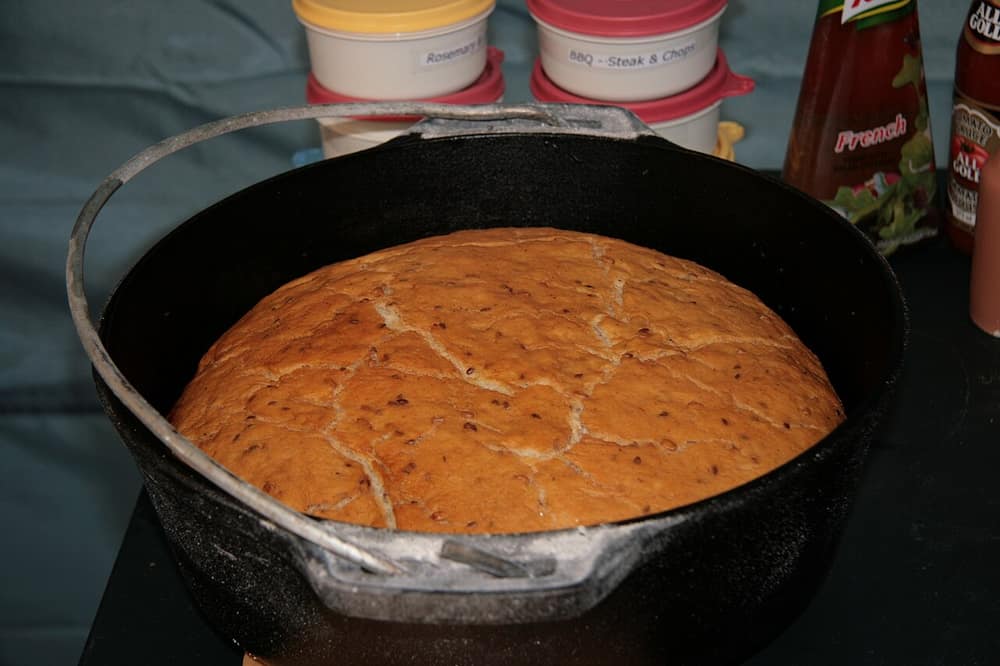
- The crust is golden to deep brown on top.
- The sound: tap the top with a knuckle or the back of a spoon. A cooked loaf sounds hollow.
- The skewer: push a long skewer or thin knife into the centre. It should come out clean, with no sticky dough.
- The temperature: if you have a probe thermometer, the middle of a cooked loaf reads about 90–95 °C.
If the top is golden but the skewer comes out sticky, put the lid back on with a few fresh coals and give it another 10 minutes. If the bottom is already very dark, slide the pot off the coals underneath and finish it with heat from the lid only.
Getting it out of the pot
Let the loaf stand in the pot for about 5 minutes, then run a knife around the edge and turn it out onto a board or wire rack. Left in the pot too long, the steam softens the crust.
Common mistakes
- Too many coals underneath. The main reason for a black bottom crust. Keep the bottom layer sparse.
- Not enough proving. A loaf that hasn’t risen in the pot comes out heavy and dense.
- Too much dough for the pot. It rises into the lid and sticks. The dough should fill no more than the bottom half before the second rise.
- Lifting the lid too often. Each look costs heat and drops ash on the bread.
- Forgetting to grease. Potbrood sticks to a dry pot. Grease the sides and lid as well as the base.
- Cutting it straight away. Give it a few minutes; the inside keeps cooking as it rests.
Variations
- Cheese and onion: knead a cup of grated Cheddar and a finely chopped onion into the dough after the first rise.
- Herb bread: add chopped rosemary or thyme, or a few spoons of dried mixed herbs, with the flour.
- Ready-made dough: many bakeries and supermarkets sell raw bread dough. Shape it, prove it in the pot and bake it the same way.
If you’d rather make individual rolls on the grid, our roosterkoek recipe uses the same kind of dough. For the rest of the menu, see our braai salads.
What to buy
A flat-bottomed bread pot is the one piece of kit that makes potbrood easy. Add gloves long enough to handle a hot lid, and you’re set.

Megamaster
Megamaster Bread Pot
A flat-bottomed cast-iron pot made for bread, with a raised lid so coals sit on top without sliding off. This is the shape potbrood wants.
- Cast iron
- Flat bottom
- Raised lid for coals on top
- Built for exactly this job
- Cast iron spreads the heat evenly
- Heavy, like all cast iron
- Needs seasoning and drying after use or it rusts

Megamaster
Megamaster No 4 Potjie
A classic three-legged potjie with a well-fitted lid. If you'd rather own one pot than two, it handles a potjie on Saturday and a loaf on Sunday.
- Cast iron
- Three legs
- Fitted lid
- Doubles as your potjiekos pot
- Legs stand straight over a bed of coals
- Round bottom gives a rounder loaf and is easier to scorch
- Pricier than a bread pot

Arbor Safety Co
Red Heat Resistant Elbow length Gloves
Long leather welding gloves with a 20 cm cuff, for lifting a hot lid and handle. A kitchen oven glove is too short for a pot sitting in coals.
- Chrome leather
- Cotton lined
- 20 cm cuff
- Covers your forearms
- Cheap
- Rated for 120 °C contact heat: grip briefly, don't hold glowing coals
Prices change often; check the retailer for the current price and stock. We may earn a commission if you buy through these links, at no extra cost to you. Star ratings are the store's own customer reviews, shown once a product has at least 3. How we choose products.
FAQ
How long does potbrood take on the fire?
About an hour for a 1 kg loaf in a No. 12 flat pot, over a few coals underneath with more on the lid. A half batch in a smaller pot takes 40–50 minutes.
How many coals go under a potbrood pot?
Only a few, spread thinly, with more on the lid. Cast iron holds heat, so too many coals underneath burn the bottom crust before the middle is cooked.
Why is my potbrood burnt at the bottom?
The heat underneath was too strong. Use fewer, older coals below the pot, raise it on a grid if you can, and put more of the heat on the lid.
Can I make potbrood in a normal three-legged potjie?
Yes. Grease it well and use even fewer coals underneath, because the round bottom sits closer to the heat. The loaf comes out rounder.
What size pot do I need for potbrood?
A flat-bottomed No. 12 pot of about 5 litres takes a 1 kg flour loaf. A No. 10 of about 3 litres suits a half batch. Check the litre capacity, because sizes vary between brands.
How do I know potbrood is cooked inside?
It sounds hollow when tapped and a skewer pushed into the centre comes out clean. If you have a thermometer, the middle should read about 90–95 °C.

Johan Botha
Braai & outdoor editor
Writes our braai, fire pit and pizza oven guides. Firmly in the wood-fire camp, but owns up to a gas braai for weeknights.
More from Johan →