We're independent: products are chosen on merit and prices come from the retailers' own sites. We may earn a commission if you buy through our links. Learn more.
Key takeaways
- There are four DIY routes: a braai-top conversion (an afternoon), a clay cob oven, a modular refractory kit, or a fire brick dome from scratch (several weeks).
- Use fire bricks and refractory mortar inside the oven. Ordinary bricks and cement break down at pizza temperatures.
- The insulation layer under the cooking floor makes the biggest difference to how well the oven holds heat.
- Cure a new oven with small fires over about a week. Rushing it is the main cause of cracked domes.
- Any gas burner must be installed by a registered gas installer who issues a certificate of compliance.
Building your own pizza oven is one of the most satisfying garden projects there is, and one of the easiest to get wrong. A dome that looks perfect can crack on its first big fire, or lose its heat so fast that the second pizza never cooks properly.
You can build a pizza oven four main ways: a brick dome from fire bricks (the most work, the best result), a modular refractory kit that you assemble and insulate (faster and more predictable), a clay cob oven (cheap and rustic), or a braai-top conversion using a stone or insert (cheapest, done in an afternoon). Whichever you choose, the essentials are the same: a solid base, refractory materials that handle 400°C+, good insulation and a slow curing process. This guide covers each route, the materials, the build steps and how to cure the finished oven.
Build options compared
| Option | Skill level | Time | Price band | Heat retention | Best for |
|---|---|---|---|---|---|
| Braai-top conversion (stone or insert) | Beginner | An afternoon | Entry | Low | Trying pizza on your existing braai |
| Clay cob oven | Beginner to intermediate | 2–3 weekends | Entry | Medium | Budget, rustic look, a fun family build |
| Modular refractory kit | Intermediate | 2–4 weekends | Mid to premium | High | A reliable result without masonry skills |
| Fire brick dome (from scratch) | Advanced | Several weeks | Mid to premium | High | Experienced DIYers who want a showpiece |
| Professionally built oven | None | Builder’s schedule | Premium | High | Outdoor kitchens and built-in braai areas |
Quick answer: if you’ve never made pizza at high heat, start with a braai-top conversion. If you already know you love it and want a permanent oven, a modular kit is the safest bet for most DIYers. Save the from-scratch brick dome for when you have masonry experience and patience.
Option 1: a braai-top conversion
The quickest route. A cordierite or ceramic pizza stone on a gas braai, or a pizza ring that sits between the bowl and the lid of a kettle braai, gets you good pizza at around 250–350°C. Kettle conversion kits are made for the common 57 cm kettle size, so check yours before buying.
A stainless pizza insert is the next step up: a box with a door, stones and a gauge that sits on the braai and traps heat around the pizza. If you find you love it, upgrade later. Our pizza oven guide compares portable ovens if you’d rather buy than build.
Materials for a permanent oven
| Part | Material | Why |
|---|---|---|
| Foundation | Reinforced concrete slab | Ovens are heavy; cracks start at the base |
| Stand | Brick, block or steel frame | Raises the oven floor to a comfortable working height (about waist height) |
| Insulating hearth layer | Vermiculite or perlite concrete, or calcium silicate board | Stops heat escaping downwards |
| Cooking floor | Fire bricks or a refractory hearth slab | Withstands direct high heat |
| Dome | Fire bricks, refractory castable, a kit dome or clay cob | Holds and radiates heat |
| Mortar | Refractory (high-temperature) mortar | Normal cement mortar breaks down with heat |
| Dome insulation | Ceramic fibre blanket, then vermiculite or perlite render | Keeps heat in for hours |
| Outer shell | Render, stone cladding or a built enclosure | Weatherproofing |
| Flue | Steel flue pipe with a cap, at the front of the oven | Draws smoke out of the mouth, away from the cook |
Buy fire bricks and refractory mortar from refractory suppliers, builders’ merchants that stock them, or specialist oven suppliers.
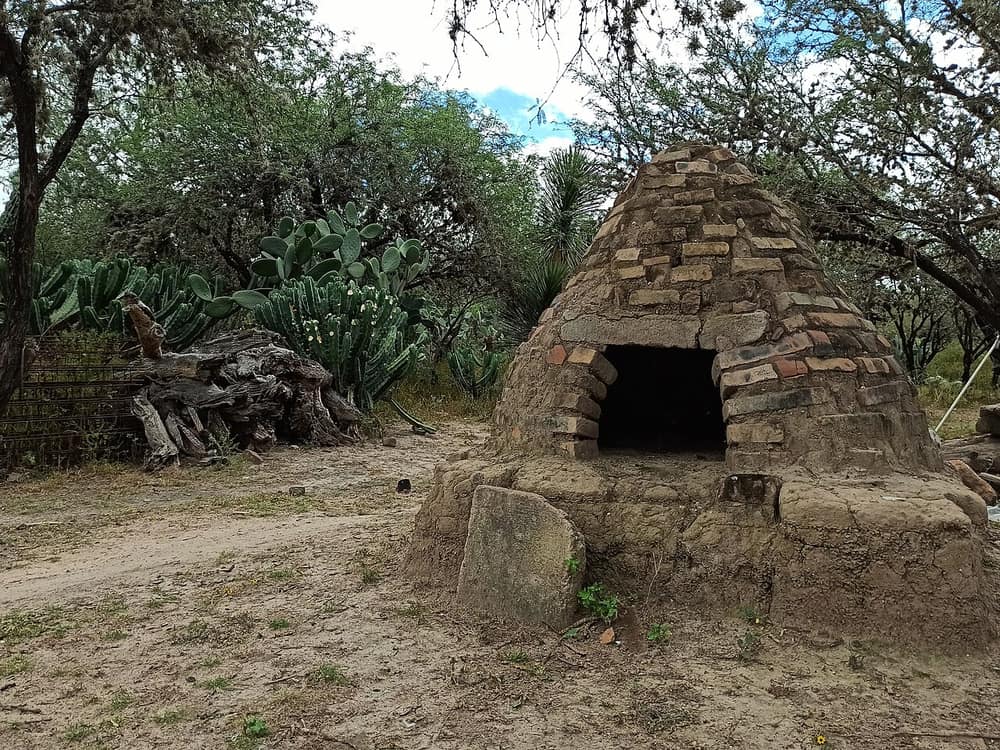
Option 2: building a brick dome, step by step
This is an overview; follow detailed plans for your chosen size.
- Pick the spot. Choose level ground with good access, away from the house, thatch, overhanging trees and boundary walls, and think about where the smoke will go. Check any estate or municipal building rules first.
- Pour the foundation. A reinforced concrete slab a little bigger than the stand. Let it cure properly.
- Build the stand in brick or block to about waist height, with an open area underneath for wood storage if you like. Cast a reinforced slab on top.
- Lay the insulation layer. Cast a layer of vermiculite or perlite concrete (or lay insulating board) over the stand slab. This step makes the biggest difference to how well the oven holds heat.
- Lay the cooking floor. Set fire bricks flat on a thin bed of sand-and-fireclay mix, keeping the surface perfectly level and joints tight so the peel won’t catch.
- Build the dome. Mark the inside circle (around 80–100 cm for a home oven), then lay fire bricks in rings with refractory mortar, each ring leaning slightly inwards. A sand form or a plywood former helps support the top courses.
- Set the door height. The door opening should be roughly 60–65% of the internal dome height; this ratio helps the oven draw air and hold heat.
- Build the entry arch and flue at the front, outside the door opening.
- Insulate the dome with ceramic fibre blanket and then a thick layer of vermiculite or perlite render.
- Finish the outside with a weatherproof render or cladding, or build an enclosure around it.
- Cure the oven (see below) before your first pizza.
Option 3: a modular kit
Refractory kits come as pre-cast dome sections and floor tiles that fit together on your stand. You still need the foundation, stand, insulation and outer finish, but the hardest part (the dome geometry) is done for you. Follow the kit maker’s instructions for insulation thickness and curing, as these vary by product.
Option 4: a clay cob oven
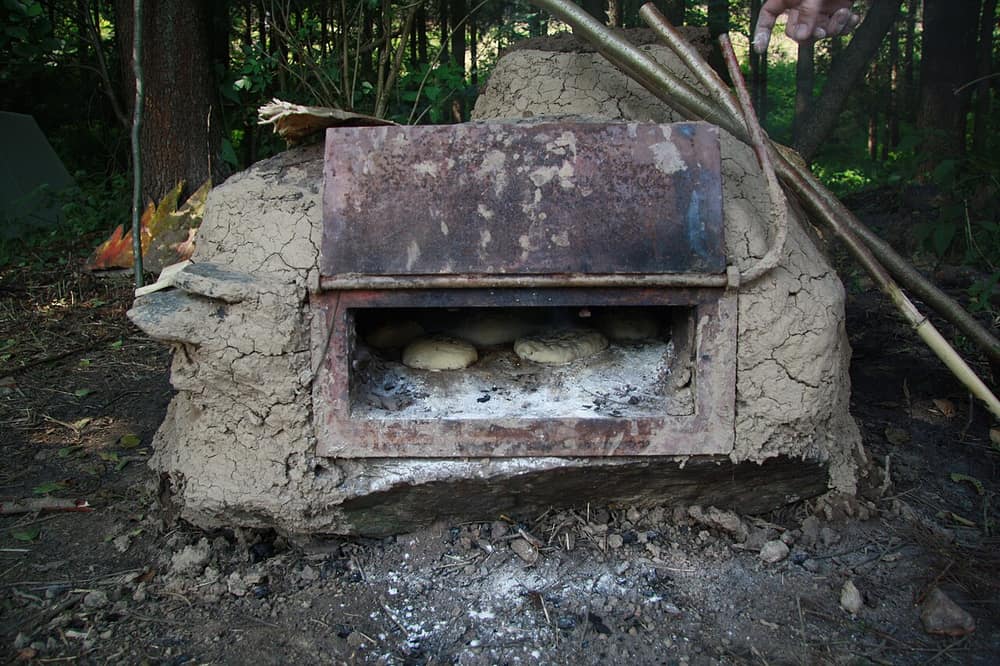
A cob oven is built from a mix of clay, sand and straw, shaped over a sand dome that’s dug out once the cob firms up. It’s cheap and satisfying to build, but it needs a roof or shelter to protect it from rain, and it won’t last as long as a brick oven.
Curing your oven
New mortar, castable and render all contain water. Heat it too fast and that water turns to steam and cracks the dome. Curing means drying it gently with a series of small fires over several days, increasing the size each day.
| Day | Fire | Rough target |
|---|---|---|
| 1–2 | Very small fire (kindling only) for a few hours | Warm to the touch outside |
| 3–4 | Slightly larger fire | Around 150–200°C inside |
| 5–6 | Moderate fire | Around 250–300°C inside |
| 7 | Full fire | 400°C+, pizza ready |
Kit makers often give their own schedule; follow it where it differs. Small hairline cracks in the outer render are common and usually cosmetic.
Kit for a DIY pizza oven
Whether you’re starting with a stone on the braai or building into an outdoor kitchen, these are useful buys. Prices were checked in November 2026.

ALVA
Pizza Stone Ceramic 30cm With Lifter & Cutter
A 30 cm ceramic stone with a chrome carry rack and a cutter: everything you need to try braai-top pizza this weekend. The porous stone draws moisture out of the base for a crisper crust.
- 30 cm ceramic stone
- Chrome steel carry rack
- Cutter included
- Costs less than a bag of fire bricks
- Rack makes the hot stone easier to move
- 30 cm limits pizza size

Jetmaster
Jetmaster Stainless Steel Pizza Insert
A stainless box with a door, stones and a temperature gauge that turns a braai into a pizza and bread oven. A much bigger step up than a loose stone, with no building work.
- 304 stainless steel
- 428 × 165 × 375 mm
- Pizza stones, door and small paddle
- Temperature gauge
- Works on any braai
- Also bakes bread and Mediterranean dishes
- Low 165 mm height limits what fits inside
- 1-year warranty on the body

Arbor Safety Co
Infrared Thermometer
Point-and-shoot temperature readings for the cooking floor while you cure and cook. Check the maximum reading suits pizza-oven heat before you rely on it.
- Infrared, non-contact
- Very cheap
- Reads the floor, not just the air
- Basic unit: the store offers no guarantee on thermometers

4 in 1 Quadro
Jetmaster 4 in 1 QUADRO MK2 (braai / fireplace / pizza oven / potjie pot) mild steel Built-in
If you're building an outdoor kitchen anyway, this built-in unit gives you a braai, fireplace, pizza oven and potjie spot in one. It skips the dome-building entirely.
- Built-in
- Braai, fireplace, pizza oven and potjie
- Mild steel
- Four uses from one build-in
- No refractory dome to build or cure
- Adapters, flue pipes and cowls are sold separately
- Needs a proper builder's enclosure
Prices change often; check the retailer for the current price and stock. We may earn a commission if you buy through these links, at no extra cost to you. Star ratings are the store's own customer reviews, shown once a product has at least 3. How we choose products.
When to call in a professional
If your oven is part of an outdoor kitchen, sits near the house or a boundary, needs a tall flue, or includes a gas burner, it’s worth getting a builder involved. You can get quotes from local builders for a built-in pizza oven or a complete braai area.
Keep a fire extinguisher or fire blanket near any wood-fired oven, as you would near a braai; our fire extinguisher guide explains which type to buy.
FAQ
How long does it take to build a pizza oven?
A braai-top conversion takes an afternoon. A cob oven or a modular kit typically takes a few weekends, and a fire brick dome from scratch can take several weeks, plus a week of curing.
Can I use ordinary bricks to build a pizza oven?
Not for the cooking floor or the inside of the dome. Use fire bricks and refractory mortar, which are made for high temperatures. Ordinary bricks can be used for the stand and outer enclosure.
What size pizza oven should I build?
An internal diameter of about 80–100 cm suits most homes: room for one or two pizzas at a time without needing a huge fire. Smaller ovens heat faster; larger ones suit big gatherings and baking.
Why is curing necessary?
Moisture trapped in the mortar and render expands as steam when heated. Gradual small fires drive it out slowly and reduce the risk of cracks.
Can a pizza oven be part of a built-in braai?
Yes. Many outdoor kitchens combine a built-in braai, a pizza oven and shared flue or chimney work. Plan the layout and smoke flow before you start.

Johan Botha
Braai & outdoor editor
Writes our braai, fire pit and pizza oven guides. Firmly in the wood-fire camp, but owns up to a gas braai for weeknights.
More from Johan →