We're independent: products are chosen on merit and prices come from the retailers' own sites. We may earn a commission if you buy through our links. Learn more.
Key takeaways
- After every braai, run the burners on high with the lid closed to burn off residue, then brush the grid while it is warm.
- Empty the drip tray and grease cup often. Built-up fat is the fuel for most gas braai fires.
- Spiders and insects nest in burner and venturi tubes. Yellow, uneven flames or fire near the knobs mean switch off at the cylinder and clean the tubes before you use it again.
- Leak test with soapy water whenever you reconnect the gas, and replace a cracked, stiff or out-of-date hose.
- For winter, deep clean and dry the braai, close and disconnect the cylinder, keep the cylinder outdoors and cover the braai once it is cool and dry.
A gas braai forgives a lot of neglect, right up until it doesn’t. The flames start to burn yellow, the drip tray catches alight under a batch of chops, or the burner you haven’t lit since May won’t light at all because something has moved into the tube.
There’s no ash, and the burners do half the cleaning for you. This guide covers the routine after every braai, the monthly clean, burners and the venturi tubes where spiders like to nest, the drip tray and grease fires, hose and regulator checks, and putting the braai away for winter. For charcoal and wood braais, see how to clean a braai.
Quick answer: what to clean and when
| Part | After every braai | Every month or so | Once or twice a year |
|---|---|---|---|
| Grids and plates | Burn off on high, brush while warm | Wash in warm soapy water | Check for rust or flaking enamel |
| Drip tray and grease cup | Check the level | Empty, scrape and wash | Replace a rusted-through tray |
| Burners and flame tamers | Watch the flame colour | Brush off debris | Remove, clear the ports and venturi tubes |
| Hose, regulator, cylinder | Close the cylinder valve | Soapy-water leak test | Replace a worn hose; full check before summer |
| Outside of the braai | Wipe splashes | Clean stainless along the grain | Deep clean before winter storage |
Your manual has the final word: Weber, Megamaster and Cadac each give slightly different instructions. For anything beyond brushing the grid, wait until the braai is cool and the gas is off at the cylinder.
After every braai: burn-off and grid
The quickest clean happens with the gas still on.
- Burn it off. With the food off, close the lid and run all the burners on high. Heat turns leftover fat into ash that brushes off easily. Weber’s manuals do it the other way round: preheat on high with the lid closed for 10 to 15 minutes before cooking, then brush the grate.
- Brush while warm. Turn the burners off and brush the grid. Megamaster suggests a heat-resistant glove and a brass-bristle brush dipped in water, so the steam helps lift the grease.
- Close the cylinder valve, not just the knobs.
Monthly grid clean
Lift the cold grids out and wash them in warm soapy water with a sponge or non-scratch pad, then dry them fully. Give cast iron a thin wipe of oil before it goes back, and handle enamelled grids gently so the coating doesn’t chip. The braai grid guide explains how the different materials age.
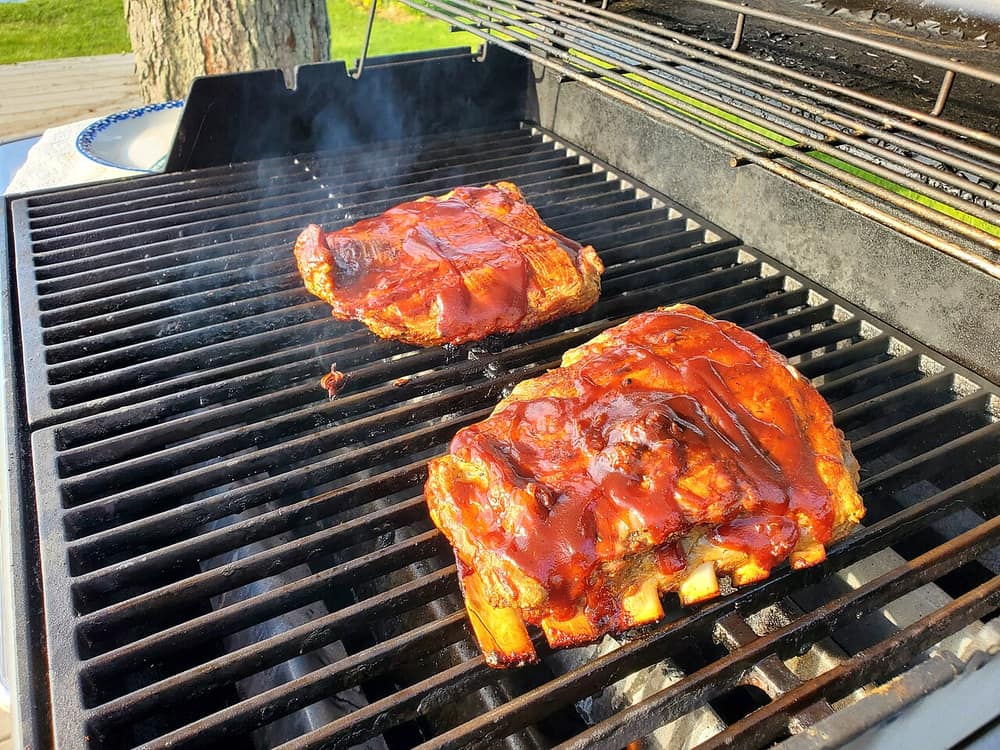
The firebox and flame tamers
Under the grids sit the flame tamers (also called flavouriser bars or heat plates), which shield the burners and collect a crust of burnt fat.
- With the braai cold and the gas off, lift out the grids and flame tamers.
- Scrape the flame tamers and wash them in warm soapy water.
- Scrape the firebox walls downwards, so debris falls into the drip tray rather than onto the burners.
Megamaster advises a soft sponge and no harsh chemicals or abrasive cleaners inside the braai, and Weber’s manuals warn against oven cleaner, abrasive cleansers, citrus-based cleaners and abrasive pads. Flaking “paint” inside the lid is usually carbonised grease, and it brushes off.
Burners and venturi tubes: the spider problem
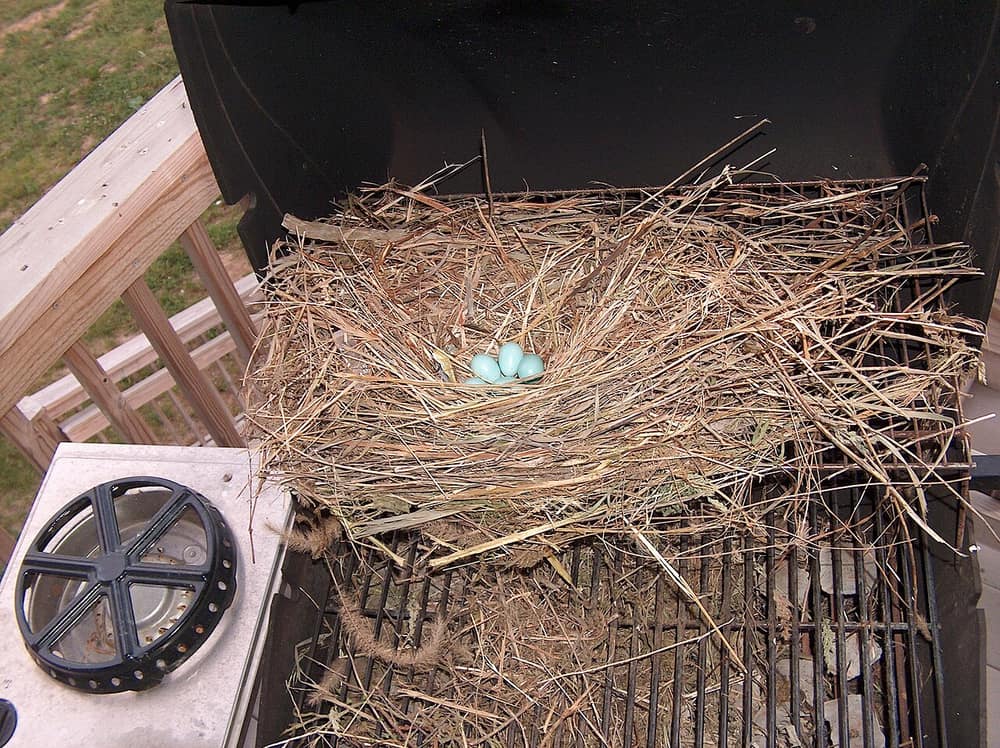
Each burner gets its gas through a short tube at the front, the venturi, where gas mixes with air before it reaches the burner ports. Spiders and insects build webs and nests in these tubes, especially when a braai stands unused. A blocked tube can force gas back out of the air openings, where it burns outside the burner. Manufacturers call this a flashback, and it can damage the control panel and injure whoever is at the braai.
Warning signs
- Flames that burn mostly yellow or orange instead of blue, or leave soot
- An uneven flame that doesn’t run the full length of the burner
- A burner that is hard to light or weaker than the others
- Flames near the control knobs, or knobs that feel hot
If you see flames at the control panel, turn the gas off at the cylinder, then turn the knobs off and let the braai cool. Don’t use it again until the tubes have been cleared.
How to clean the burners
- Gas off, braai cold. Disconnect the cylinder if you are removing burners.
- Brush the outside of each burner with a wire brush. Megamaster recommends this, plus a metal scraper for stubborn spots.
- Clear blocked ports with a straightened paper clip (Megamaster says not a toothpick). Weber’s manuals add: don’t enlarge the ports.
- Check the spider screens. Many Weber burners have mesh screens over the air intakes. Weber suggests checking them at least once a year, using a soft brush, and not prising them loose or widening the mesh.
- Clear the venturi tubes if your manual shows how to remove the burners. A long, narrow bottle brush or pipe cleaner, twisted and pulled out, removes webs.
- Refit everything carefully, making sure each burner tube sits over its gas valve exactly as before.
- Leak test every gas connection you disturbed (see below), then light the braai with the lid open and check for a steady, mostly blue flame.
Megamaster asks owners to contact its customer care if insects or debris block a burner. If your manual doesn’t show how to remove the burners, or the flame is still wrong afterwards, have the braai checked.
Drip tray, grease cup and fat fires
Fat drains into the drip tray with every braai, and a full, hot tray is fuel waiting for a spark.
- Check it every time you braai, as older Weber manuals advise for the catch pan.
- Empty and wash it often. Megamaster says to empty the grease cup regularly and wash the tray in warm soapy water, and its Blaze manual warns against letting grease build up until it overflows.
If the fat catches fire
A short flare-up when fat hits the flame tamers is normal. A fire that keeps burning in the tray or under the grids is not.
- Turn all the burners off. Weber’s manuals say to turn off all burners and leave the lid closed until the fire is out.
- Close the cylinder valve if you can reach it safely.
- Never throw water on it. Water on burning fat makes it spit and spread.
- If it doesn’t die down, or spreads beyond the braai, get people back and call 112 from a cellphone. A dry chemical powder extinguisher is for a small fire you can tackle from a safe distance with an exit behind you; our fire extinguisher guide explains which type to keep near the braai.
Afterwards, clean the tray thoroughly and check the hose wasn’t damaged by heat.
Hose, regulator and leak checks
Most gas leaks start at the fittings and the hose, not the cylinder. Megamaster recommends a soapy-water leak check every month.
The soapy-water test: with the burner knobs off and the cylinder valve open, brush soapy water over the cylinder valve, regulator, both hose ends and the joint where the gas enters the braai. Growing bubbles mean a leak: close the cylinder, tighten or replace the part and test again. Never check for leaks with a flame.
The hose: bend it gently along its length. Replace it if it is cracked, stiff, kinked, swollen, scorched or chewed, or past the date printed on it. Use proper LPG hose with clamps at both ends; in South Africa, look for hose marked as made to SANS 1156. Keep the hose clear of the hot firebox and drip tray.
The regulator: replace a cracked washer or O-ring, never open up or adjust a regulator, and don’t use adaptors to make one fit. Our gas cylinder safety guide covers changing cylinders and what to do if you smell gas.
The outside: stainless, paint and the coast
- Stainless steel: warm soapy water and a soft cloth, wiping along the grain. Keep a stainless cleaner for baked-on grease, and skip steel wool, which Megamaster warns scratches.
- Painted and enamelled panels: soapy water and a soft sponge only.
- At the coast: rinse off salt spray more often, because salt causes rust spots and brown “tea staining” on stainless.
- Dry everything before you reassemble the braai, as Megamaster advises, and before you cover it.
End-of-season care and storage
A braai that stands unused for months needs a proper clean first, or it comes back rusty and full of nests.
- Deep clean everything as above, dry it fully and oil cast-iron grids lightly.
- Close the cylinder valve and disconnect the cylinder.
- Keep the cylinder outdoors, upright, shaded and away from drains. Weber’s guidance is clear that a gas cylinder should never be stored indoors, even if the braai goes into the garage.
- Cover the braai once it is cool and dry. A cover over a wet braai traps moisture.
- Before the first braai of the new season, look under the lid and in the burners for nests, leak test the hose and regulator, and light with the lid open.
Cleaning kit worth buying
A brush or scraper for the warm grid, a stainless cleaner, a cover and, when the old one ages, a hose and regulator kit. These were in stock when we checked, from around R79 for Alva’s stainless braai cleaner to R499 for its four-burner cover (Nov 2026). Still choosing a braai? The gas braai buying guide covers burners, grids and lids, and the gas cylinder calculator works out how long a cylinder will last.

Megamaster
Megamaster Edge Grid Cleaner
Hard bristles for the top of the grid and a stainless scraper for underneath and between the bars, which is where fat collects on a gas braai's thick cast grids.
- Hard bristles
- Stainless steel scraper
- Removable bristles
- Scraper gets between the bars
- Cheap enough to replace when it wears
- Wire-type bristles: check the grid for strays after brushing

Alva
Grill Care Kit - Brush & Scraper Tool
A long-handled brass brush plus a spare head and a scrub-and-scraper tool. Brass is the bristle Megamaster suggests for warm grids, and the spare head means you can swap out a worn one straight away.
- Brass bristles
- Long wooden handle
- Replacement brush head
- Scrub tool with built-in scraper
- Spare head included
- Scraper for flat plates and curved bars
- Still a bristle brush: wipe and check the grid afterwards

ALVA
Cleaner Spray For Stainless Steel BBQ / Braai
A cleaner made for the stainless outside of a braai: the lid, side shelves and control panel that pick up fingerprints, smoke and splashes.
- Spray
- For stainless steel braais
- Made for braai stainless, not kitchen counters
- Low price
- For the outside of the braai, not the grid or burners

ALVA
Cover For 4-Burner BBQ
A fitted cover for Alva's four-burner braais that keeps off sun, rain, dust and birds between braais and through winter. Alva says to check the rating plate on your braai for the model before you order.
- For Alva 4-burner BBQs
- Protects against sun, rain, dust and birds
- Keeps nesting birds and insects out
- Cuts down on rust and fading
- Sized for Alva models: measure first if yours is another brand

ALVA
Bullnose Gas Regulator & 1.2m Hose Kit
If the hose is cracked, stiff or past its printed date, this replaces the regulator, hose and clamps in one go. Check it matches your cylinder valve and your braai's manual first.
- Low-pressure regulator, 1.2 m hose, 2 clamps
- For 9–48 kg cylinders with a 5/8" BSP bullnose valve
- SANS 1237 & SANS 1156 approved
- Replaces the most common leak points at once
- Inexpensive
- Only fits bullnose valves
Prices change often; check the retailer for the current price and stock. We may earn a commission if you buy through these links, at no extra cost to you. Star ratings are the store's own customer reviews, shown once a product has at least 3. How we choose products.
FAQ
How often should I clean my gas braai?
Burn off and brush the grid after every braai, empty and wash the drip tray and grease cup regularly, and do a full clean of the burners and firebox at least once a year. Megamaster recommends a yearly deep clean and a monthly soapy-water leak check.
Why are my gas braai flames yellow?
A mostly yellow, uneven or sooty flame often means a blocked burner or venturi tube, commonly from spider webs or insect nests. Turn the gas off at the cylinder, let the braai cool, and clean the tubes and ports or have the braai checked before using it again.
How do I stop grease fires on my gas braai?
Keep the drip tray and grease cup empty and clean, and trim excess fat off meat. If fat catches fire, turn off all the burners, close the cylinder valve if it’s safe, leave the lid closed until the fire is out, and never use water.
How often should I replace the gas hose on my braai?
Straight away if it is cracked, stiff, kinked or damaged. Otherwise follow the date printed on the hose and the manufacturer’s advice, and check it with a soapy-water leak test every time you reconnect the gas.
Can I store my gas braai in the garage over winter?
The braai can go in a garage once it is clean, dry and disconnected, but the gas cylinder stays outdoors, upright and in a ventilated, shaded spot. Never store a cylinder in a garage or shed.

Johan Botha
Braai & outdoor editor
Writes our braai, fire pit and pizza oven guides. Firmly in the wood-fire camp, but owns up to a gas braai for weeknights.
More from Johan →