We're independent: products are chosen on merit and prices come from the retailers' own sites. We may earn a commission if you buy through our links. Learn more.
Key takeaways
- Lump charcoal lights fast and burns hot: ideal for a quick braai of steaks and chops.
- Briquettes take longer to light but give steady, even heat for longer: better for kettle braais, roasts and big groups.
- A chimney starter and a couple of firelighters light either fuel without lighter fluid.
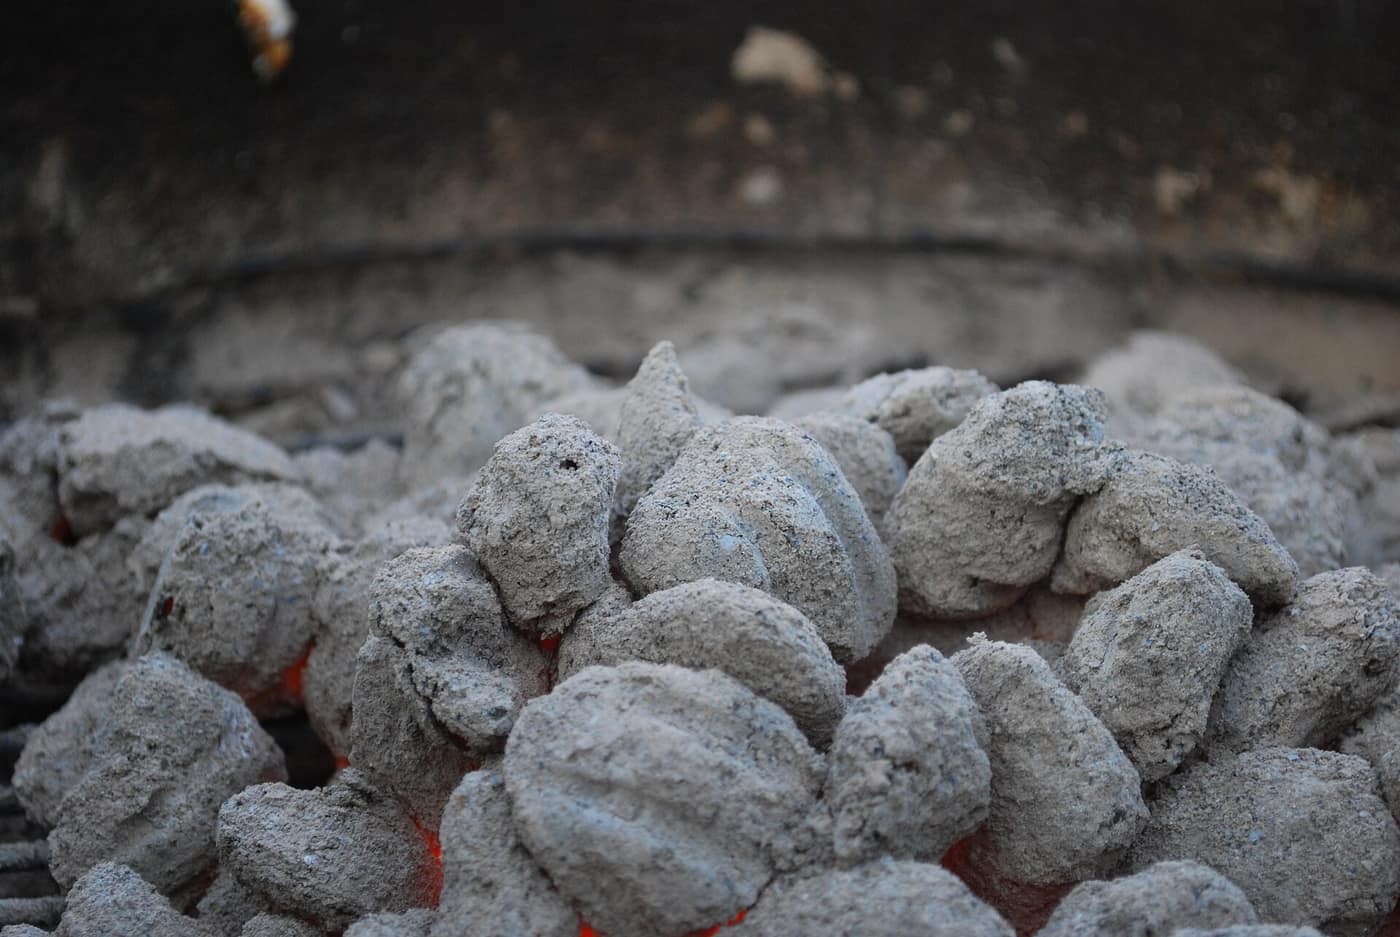
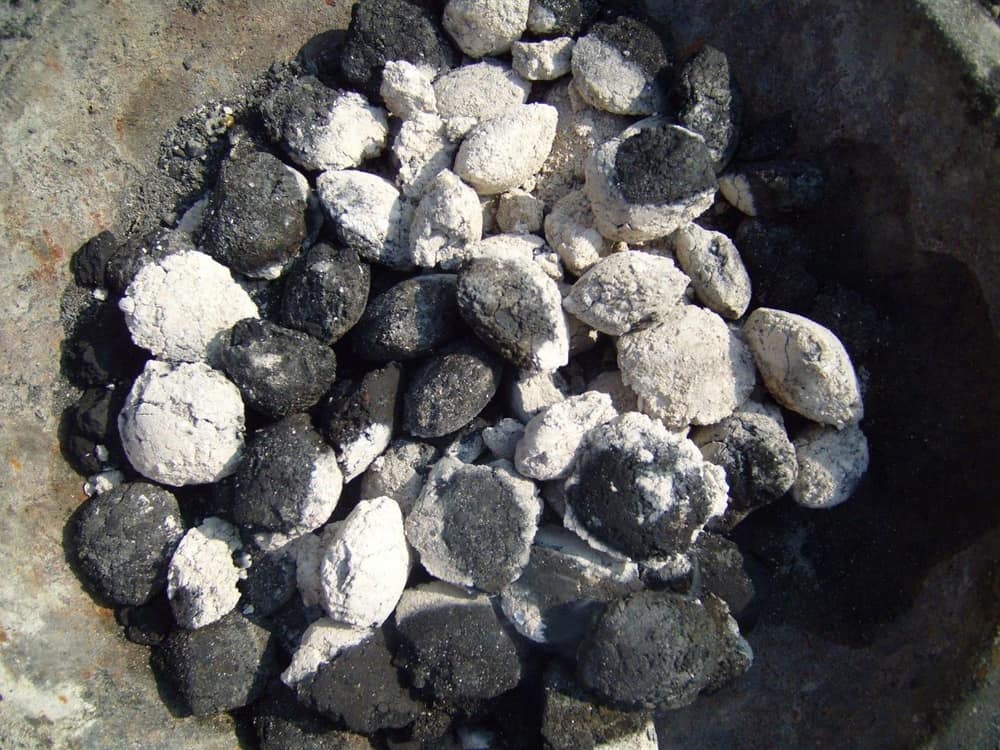
- Coals are ready when most are covered in fine grey ash and the flames have died down.
- Never use charcoal indoors, in a garage, tent or caravan: it gives off carbon monoxide you can't see or smell.
Charcoal is the shortcut every braaier takes sooner or later. A wood fire is a beautiful thing, but on a Wednesday night, with hungry kids and a pack of chops, a chimney of charcoal gets you cooking in a fraction of the time.
The catch is that “charcoal” covers several quite different fuels. Lump charcoal lights fast and burns hot, which makes it great for steaks and chops. Briquettes take longer to light but give steady, even heat for much longer, which suits kettle braais, roasts and big groups.
Charcoal vs briquettes at a glance
| Lump charcoal | Briquettes | Instant-light | |
|---|---|---|---|
| Lighting time | Fast | Slower | Fast (match only) |
| Heat | Very hot | Steady, moderate to hot | Moderate |
| Burn time | Shorter | Long | Short to moderate |
| Consistency | Uneven pieces | Very even | Even |
| Ash | Low | Higher | Moderate |
| Best for | Steaks, chops, quick braais | Kettle braais, roasts, smoking, big groups | Picnics, beach, convenience |
| Price band | Entry to mid-range | Entry to mid-range | Mid-range per braai |
Quick answer: buy lump charcoal for hot, fast braais over an open grid, and briquettes for anything with a lid or anything that cooks for longer than about an hour. Many people keep a bag of each.
What’s the difference?
Lump charcoal
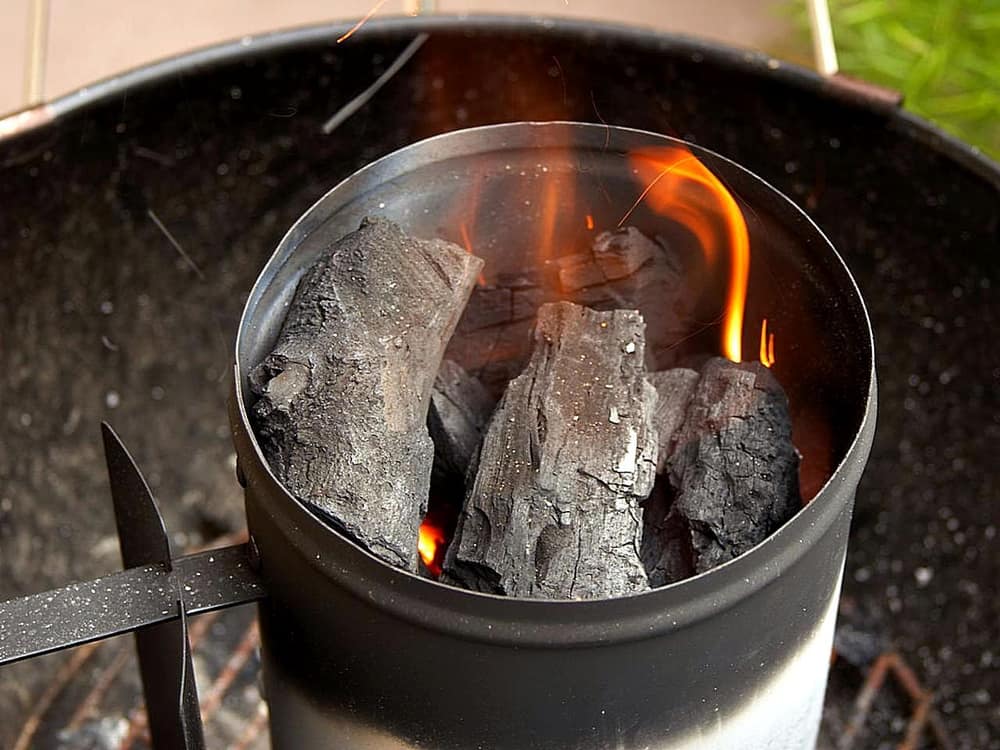
Charcoal is wood that’s been heated with very little oxygen, which drives off water and gases and leaves mostly carbon. Lump charcoal keeps the shape of the original wood, so pieces vary in size. The wood used varies by producer, and bag labels sometimes say which species it comes from.
- Lights quickly and gets very hot.
- Burns faster, so you may need to top up on a long cook.
- Produces relatively little ash.
- Uneven piece sizes mean less even heat.
Briquettes
Briquettes are made from charcoal dust or fines pressed into uniform shapes with a binder (often starch). Some also contain other ingredients to help them burn or hold together; the bag should say.
- Take longer to light and come up to heat.
- Burn evenly and for a long time.
- Uniform size makes heat predictable, which helps with indirect cooking.
- Usually produce more ash than lump charcoal.
Instant-light (self-lighting) charcoal and briquettes
These are treated with a lighting agent so you can light the bag or pile directly with a match. They’re convenient for picnics and beach braais, but let them burn until the coals are grey and any chemical smell has gone before you start cooking. For a one-off beach or park braai, a disposable braai is the same idea in a foil tray; check where you’re allowed to use one.
Coconut-shell and other alternatives
Some shops sell briquettes made from coconut shell or other materials. They tend to burn hot and long. Quality varies, so try a bag before buying in bulk.
How much charcoal to use
There’s no exact figure because bag sizes, braai sizes and weather all differ. Use these as starting points:
| Braai | How much | Notes |
|---|---|---|
| Quick direct braai for four (chops, wors, steak) | Enough coals to cover the area under the meat in a single layer, plus a little extra | Lump charcoal is ideal |
| Kettle, indirect cooking (roast chicken, lamb) | A full chimney starter of briquettes, split between two sides of the kettle | Or a charcoal basket on each side |
| Long cooks (over an hour) | Start with briquettes | Add a few fresh ones every 45–60 minutes |
| Windy days and cold weather | More than usual | Coals lose heat faster |
A full chimney starter is a useful unit of measure: note how many you need for your braai and meal, and repeat what works.
Most supermarkets sell charcoal and briquettes in 4 kg or 5 kg bags, with bigger bags at hardware and wholesale stores. A small bag covers a quick braai or two for a family; if you braai every weekend or use a kettle for long cooks, a bigger bag works out cheaper per braai, as long as you can keep it dry.
How to light charcoal and briquettes
With a chimney starter (easiest)
- Fill the chimney with charcoal or briquettes.
- Place one or two firelighters on the fire grate and light them. Not sure which kind to buy? Our firelighters guide compares the options.
- Set the chimney over the firelighters.
- Wait until the top coals are covered in grey ash, roughly 15–20 minutes for charcoal and longer for briquettes.
- Pour the coals into the braai using heat-resistant gloves.
Without a chimney
Build a small pyramid of charcoal around two or three firelighters, light them, and leave it alone until most of the coals have a grey coating. Then spread the coals out.
When are the coals ready?
Coals are ready when most of them are covered in a fine grey ash and the flames have died down. Use the hand test as a rough guide: hold your palm safely above the grid and count how long you can keep it there. The shorter the count, the hotter the coals. For more on fire building, read how to make a braai fire.
Charcoal vs wood
Charcoal and briquettes get you cooking faster than wood, with more predictable heat. Wood gives a longer social fire and more flavour, but you need to wait for it to burn down to coals. Many braaiers start a wood fire for the atmosphere and add charcoal to get coals sooner. See our braai wood guide for the best local woods, and gas vs charcoal vs wood if you’re still weighing up fuel types in general.
Setting up charcoal in a kettle braai
A kettle braai gets the most out of briquettes because you choose where the coals sit. Weber’s own 57 cm kettle guides give useful starting quantities; scale down for a smaller kettle.
| Setup | How to lay the coals | Good for |
|---|---|---|
| Direct | Spread lit briquettes evenly under the whole grid: roughly 45–50 for high heat or 30–35 for medium in a 57 cm kettle | Chops, steak, sosaties and boerewors |
| Two-zone | Pour the lit coals onto one side and leave the other side empty | Searing thick steaks or chicken pieces over the coals, then finishing them on the cool side |
| Indirect | Coals on both sides (or in two charcoal baskets), drip pan in the middle, meat over the pan | Whole chicken, leg of lamb, pork belly |
| Snake | Two rows of unlit briquettes around half the kettle wall, 8–10 fully lit briquettes at one end | Low and slow cooks: brisket, ribs, pulled pork |
The snake works like a slow fuse: the lit coals set fire to the next briquettes in line, so only a few burn at a time. Weber puts the ideal range for this at 110–135°C and says a snake can run for up to 8–12 hours. Our Weber braai guide walks through the full snake setup.
Kamados are the exception to “briquettes for long cooks”. Their small vents and tight lids depend on clean airflow, and the extra ash from briquettes gets in the way, so most kamado owners use lump charcoal; our kamado guide covers lighting and temperature control.
Buying checklist
- The right fuel for the cook: lump for quick, hot braais; briquettes for long, even heat
- Bag size that matches how often you braai
- Dry, undamaged bags (wet charcoal is hard to light)
- Not too much dust at the bottom of the bag (common with lump charcoal)
- Ingredients listed for briquettes, if that matters to you
- A chimney starter and firelighters to go with it
How to spot good charcoal before you light it
In the shop, feel the bag and read the label. The rest shows once you open it at home.
| Sign | Good bag | Poor bag |
|---|---|---|
| Piece size (lump) | Mostly fist-sized chunks or bigger | Lots of small bits and dust |
| Dryness | Light, dry, clean break | Feels heavy or damp, smells musty |
| On lighting | Catches evenly, little smoke once going | Pops, spits sparks or keeps smoking |
| Ash (lump; briquettes always leave more) | Fine, light grey | Clumpy or heavy |
| Label | Names the wood or ingredients | Says nothing about what’s inside |
Sparks and popping usually mean moisture in the charcoal, so dry it out before the next braai. A bag that’s mostly dust is still usable at the bottom of the fire, but you’re paying for fuel that falls through the grate.
Kit for charcoal braais
Charcoal works in any open braai, but a lid and adjustable vents get far more out of it. These were in stock when we checked; you’ll find chimney starters and bags of charcoal at most hardware stores and supermarkets.

Megamaster
Megamaster Braai Lighter with Refill
A long braai lighter keeps your fingers away from the firelighters under a chimney starter. This one comes with a gas refill.
- Refillable
- Includes 19 ml gas refill
- Refillable, so no more empty lighters
- Long reach under the chimney
- Still needs firelighters to light charcoal

Megamaster
Ember Series 37cm Kettle Braai
A small kettle is an affordable way to get the most out of briquettes: lid on and vents set for steady, controllable heat.
- 37 cm kettle
- Enamel-coated porcelain finish
- Hinged cooking grate
- Lid and vents give you heat control
- Close the vents to save unburnt coals
- Small grid: not for a crowd

Outback
Outback Omega 201 Charcoal Braai
A trolley-style charcoal braai with a roasting hood, side tables and an ash tray. More cooking room and workspace than a kettle.
- Charcoal
- Porcelain-enamelled roasting hood
- Two fold-up side tables
- Adjustable air vent and ash tray
- Side tables keep tools and food close
- Hood for roasting and indirect cooking
- Takes up more patio space than a kettle
Prices change often; check the retailer for the current price and stock. We may earn a commission if you buy through these links, at no extra cost to you. Star ratings are the store's own customer reviews, shown once a product has at least 3. How we choose products.
Storage and safety
- Keep it dry. Store bags off the ground, under cover, and close or clip opened bags. Damp charcoal lights badly and smokes.
- Store away from heat, flames and fuel such as petrol or lighter fluid.
- Never braai with charcoal indoors, in a garage, tent or caravan. Burning charcoal produces carbon monoxide, which you can’t see or smell. A carbon monoxide detector is worth having in any home that uses fuel-burning appliances.
- Dispose of ash safely. Let ash cool completely, ideally for a full day, then put it in a metal container.
- Keep children and pets away from hot coals and the braai.
How to put charcoal out and save what’s left
Half-burnt charcoal and briquettes relight well next time, so there’s no need to let a full load burn to ash after a short braai.
- Kettle or hooded braai: close the lid and shut every vent. Starved of air, the coals go out on their own, but they stay hot for a long time. Charcoal makers such as Kingsford advise leaving the ash for 48 hours before you handle it, so treat it as live until then and don’t move the braai near anything that can burn.
- Open braai: lift unburnt pieces with long tongs into a lidded metal bucket and stand it on a non-flammable surface, away from the house, the gas cylinder, children and pets. The bucket gets hot too.
- If you must use water: sprinkle a little at a time rather than tipping a bucket, which throws up scalding steam and ash and can crack an enamelled kettle bowl. Stir with tongs and repeat until the coals are cold right through. Soaked coals need days to dry before they’ll relight.
- Next braai: shake off the ash, mix the old pieces with fresh charcoal in the chimney and light as normal. Before you put the braai away, our how to clean a braai guide covers getting rid of the ash.
FAQ
Is charcoal or briquettes better for a braai?
Neither is better for everything. Lump charcoal is great for hot, quick braais of steak and chops. Briquettes are better for kettle braais, roasts and long cooks because they burn evenly for longer.
How long do briquettes take to be ready?
In a chimney starter, briquettes usually take 20 to 30 minutes, depending on the brand, wind and how full the chimney is. They’re ready when they’re mostly covered in grey ash.
Can I mix charcoal and briquettes?
Yes. Some braaiers start with lump charcoal for fast heat and add briquettes for a longer, steadier burn. Mixing is fine as long as all the coals are properly lit before you cook.
Can I reuse charcoal?
Yes. Shut the lid and vents on a kettle, or move unburnt pieces into a lidded metal bucket, then light them with fresh charcoal next time.
Does charcoal go off?
Plain lump charcoal and briquettes don’t expire as long as they stay dry. Instant-light charcoal is different, because the lighting agent can lose strength over time, and faster once the bag is opened. Keep those bags sealed and use them within a season or two.
Why won’t my charcoal light?
The most common causes are damp charcoal, too little airflow or too few firelighters. Store charcoal dry, use a chimney starter, and make sure the braai’s vents are open.

Johan Botha
Braai & outdoor editor
Writes our braai, fire pit and pizza oven guides. Firmly in the wood-fire camp, but owns up to a gas braai for weeknights.
More from Johan →